Webflow. Delete Site in 2025. The Process Has Changed
At the end of the year 2023, Webflow slightly changed the process of a website deletion, since then you might struggle to find the Delete button.
To delete a Webflow site, navigate to the Dashboard, click the Ellipsis button at the right-bottom corner of the site tile and select the Archive option. In the opened pop-up, confirm the action by entering the site ID and clicking the Archive Site button. After that, go to the Webflow Support page and send a request for permanent site deletion.
As for today, you need to archive the site first and then contact Webflow Support. Let’s dive into the new process more in detail.
How to Delete a Webflow Site in 2025
So, the process consists of two parts:
- site archivation, which takes no effort
- request for support, which requires collecting some data beforehand.
Before jumping into action, it’s worth doing two things:
- Write down the project name, the site domain, and the site read-only link somewhere. Even though this data is optional, it’s still helpful information for Webflow support. The more information you provide, the better result you will get.
- Go through this checklist 7 Things to Do Before Deleting / Archiving a Webflow Site, which might help you prevent irreversible consequences
Step 1. Archive your Webflow site
Follow these steps to permanently delete a Webflow site:
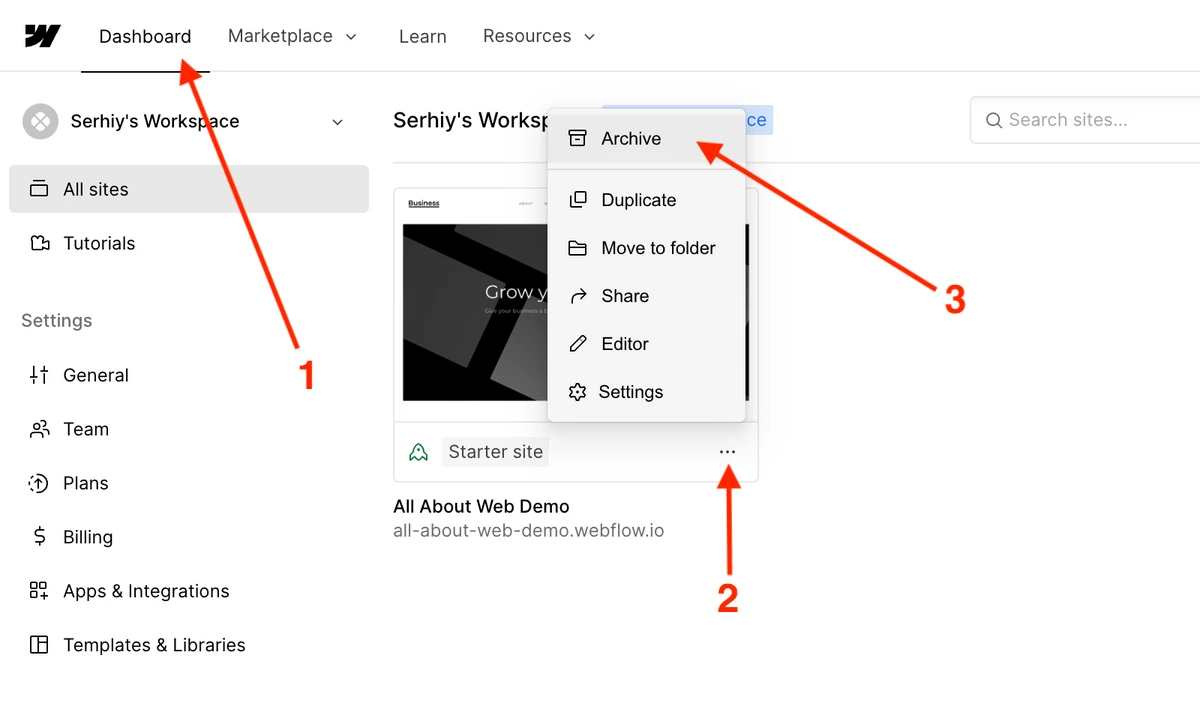
- Navigate to the Dashboard
- Click the Ellipsis button (here if you select the Share option and you can get the site Read-only link for the Step 2)
- Select the Archive option
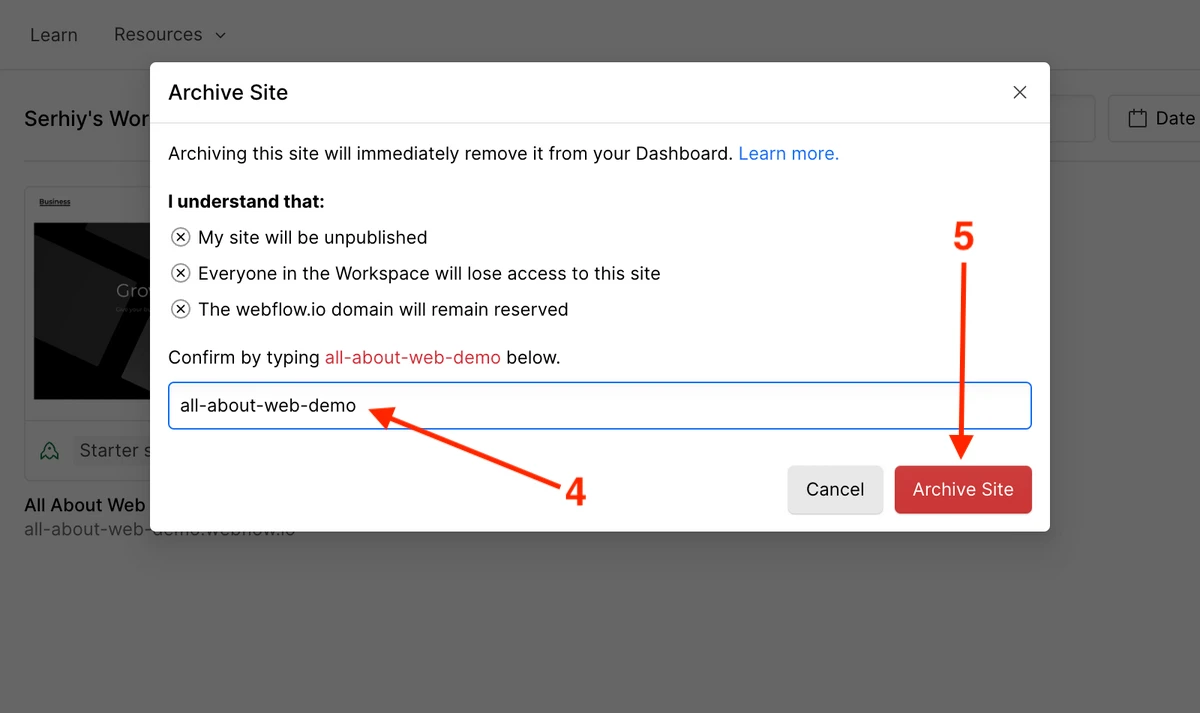
- Enter the site ID in the opened pop-up
- Click Archive Site
Step 2. Reach out to the Webflow Support
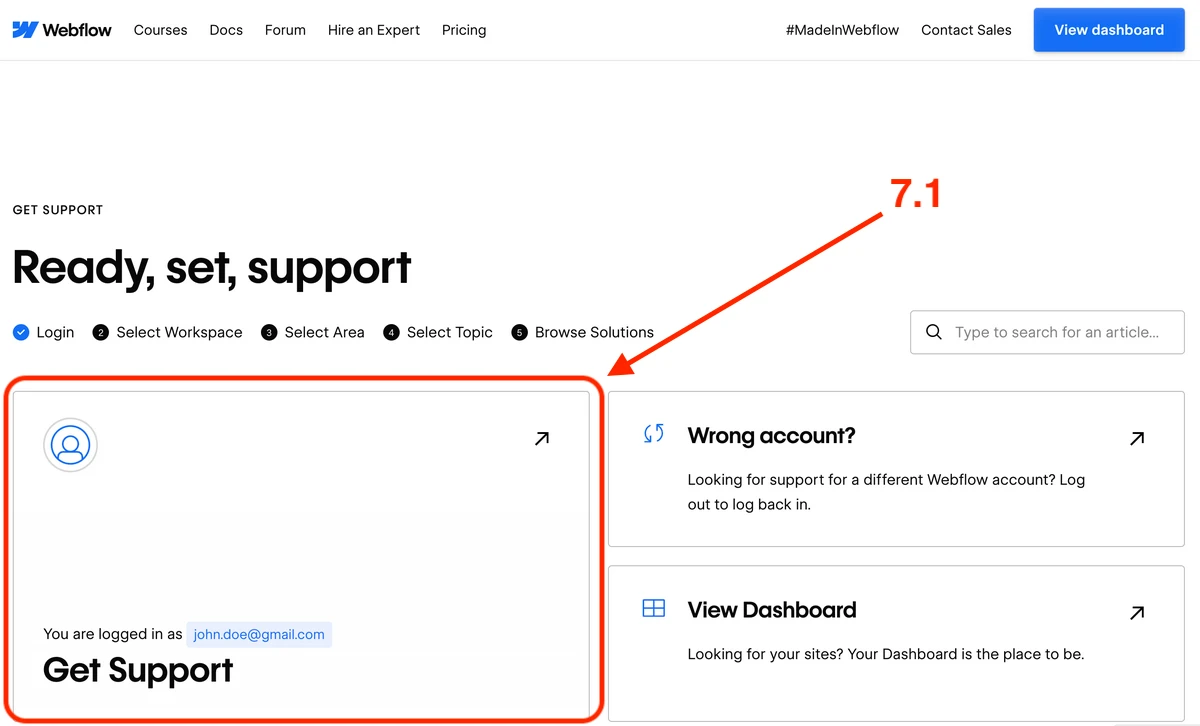
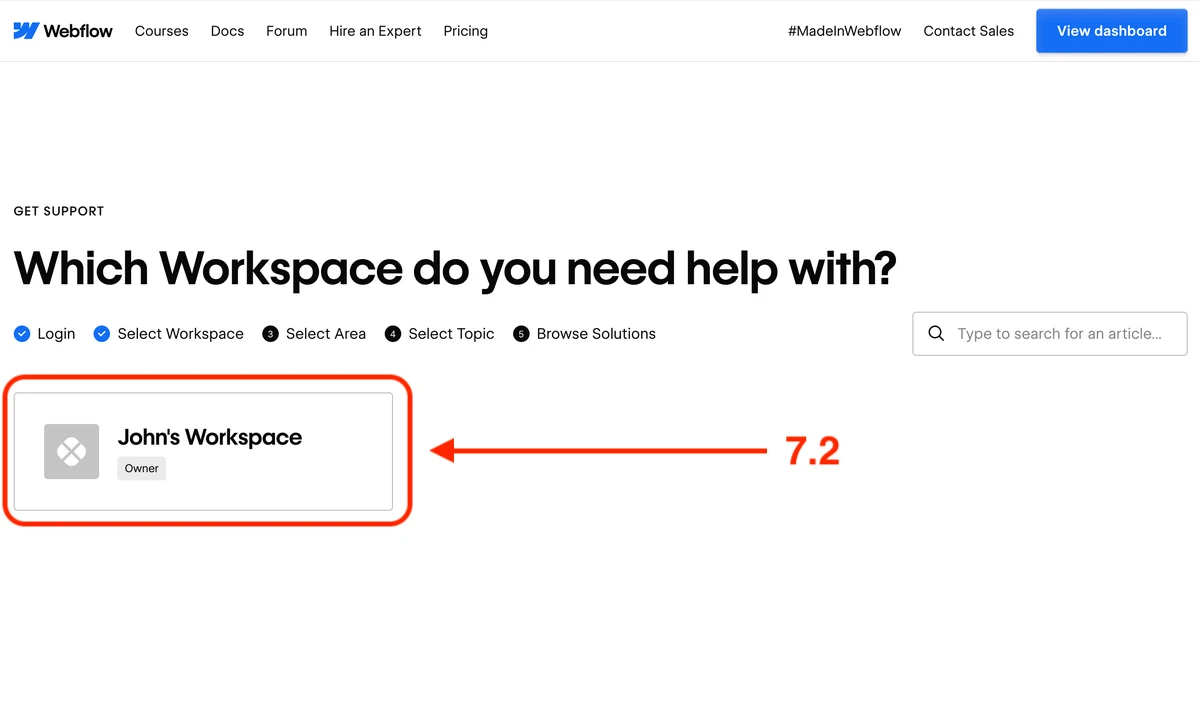
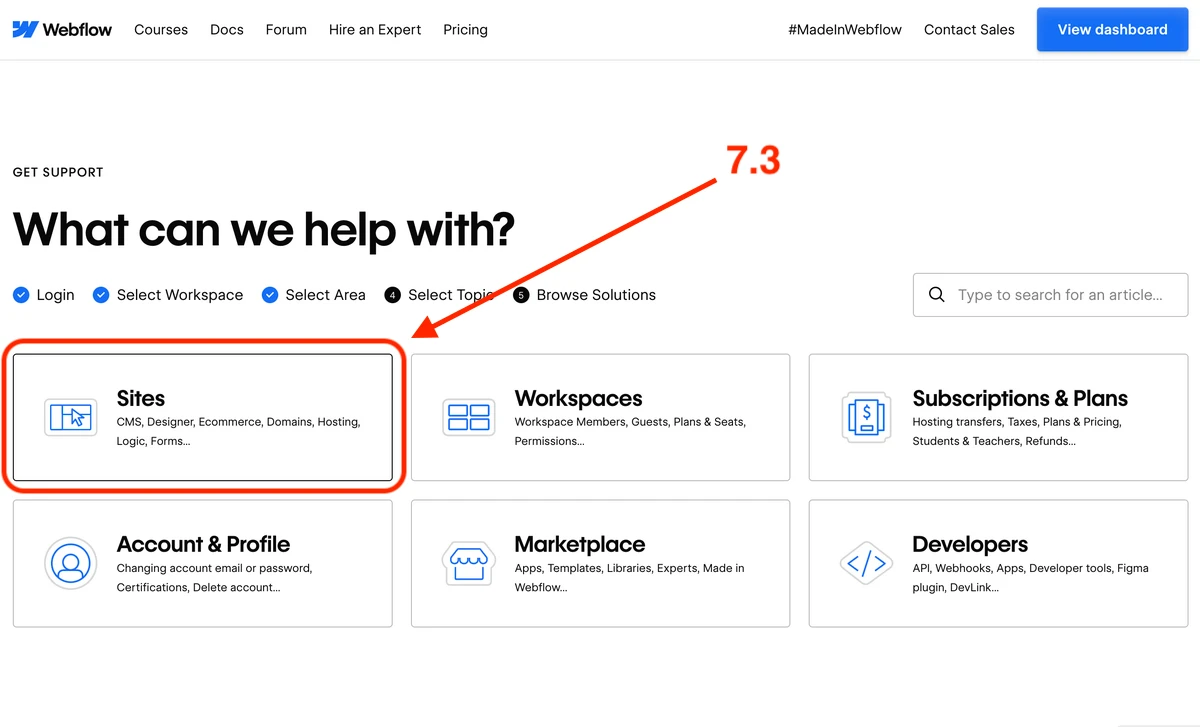
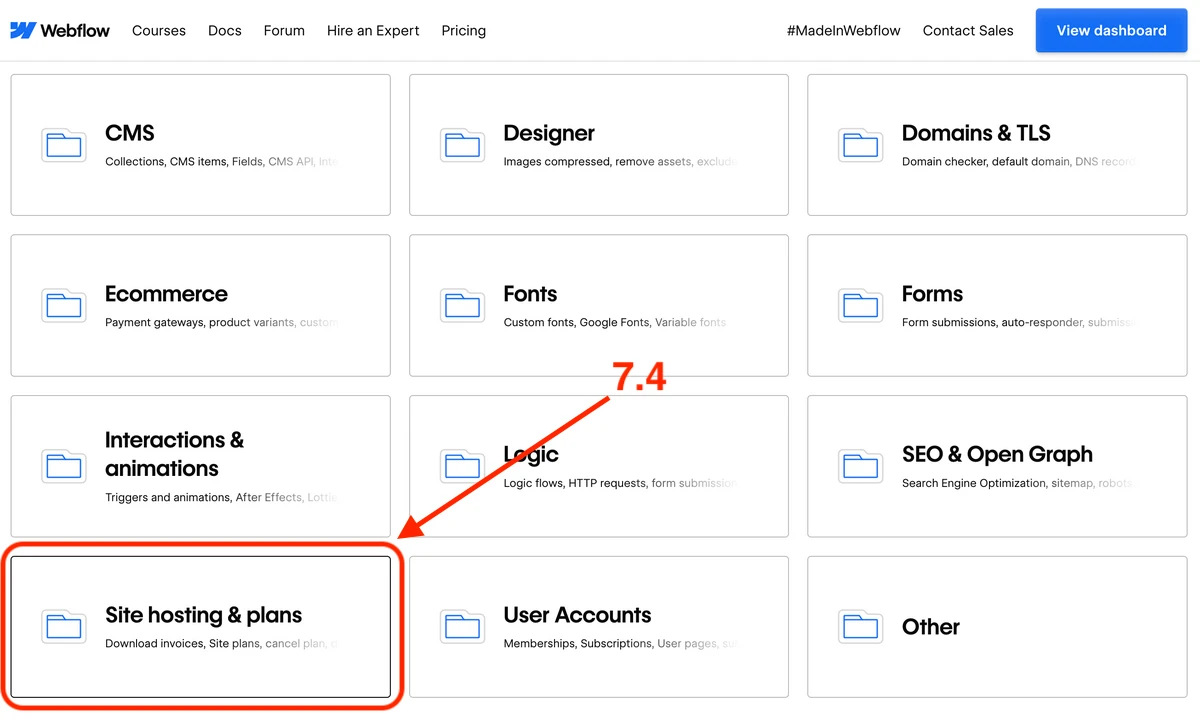
Go through the Get Support flow steps
- Go to the Webflow Support portal and login
- Select your Workspace
- Select Sites
- Select Site hosting & plans
- Select Email Webflow Support to provide the details
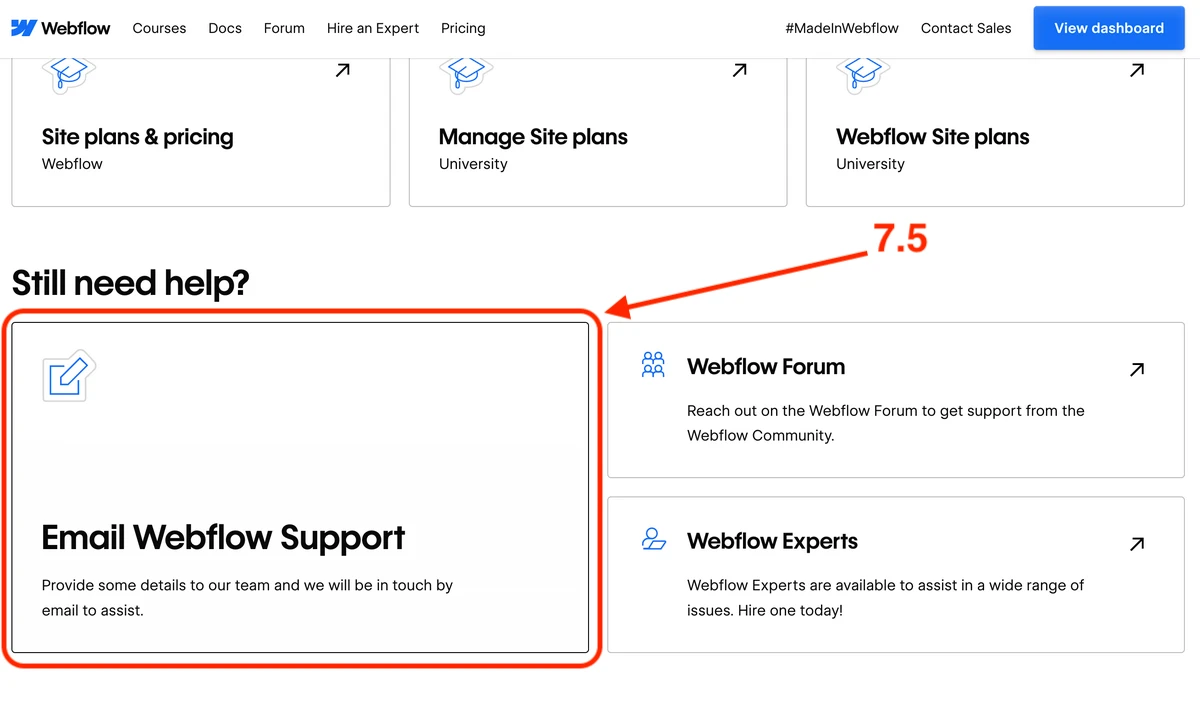
- Fill out this form
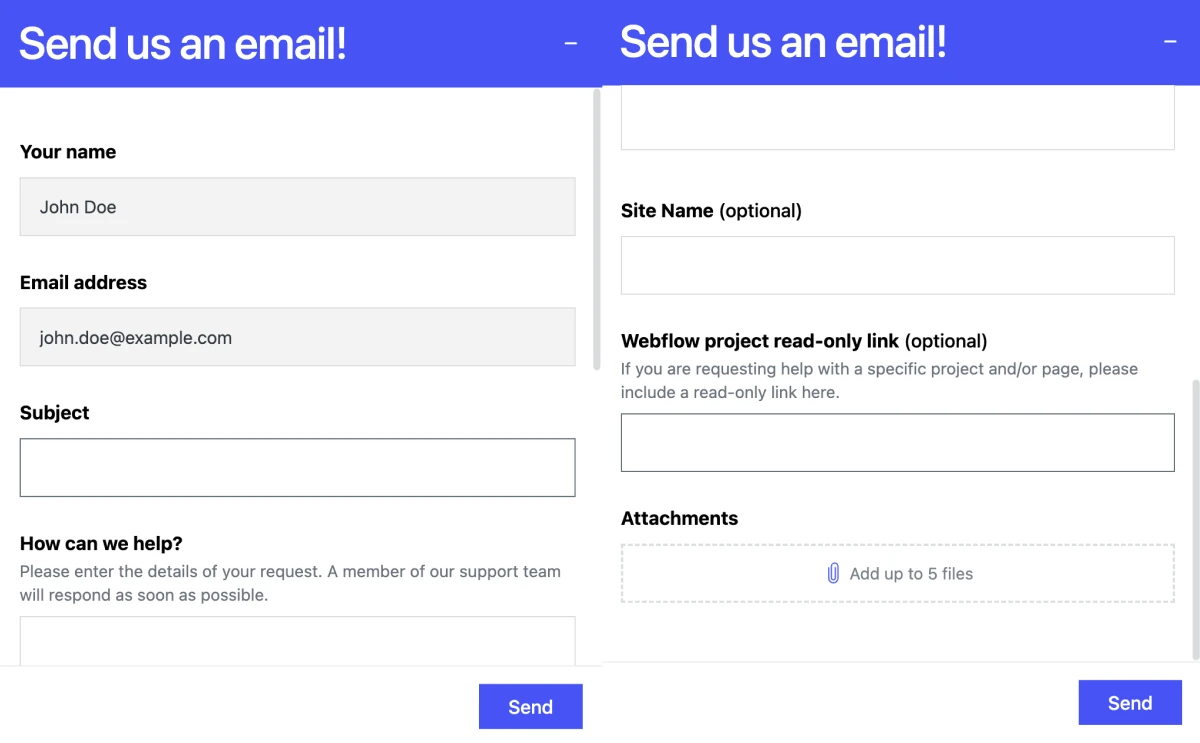
This is an example of how I would fill the form out:
Your name: First name + Last name
Email address: your.email@example.com
Subject: Permanent site deletion
How can we help?: Hello! I have recently archived a website (your-site-domain.com), and I would like to delete it. Could you assist me with that, please?
Site name (optional): Your site name
Webflow project read-only link (optional): Your site read-only link
Attachments: I don’t think you need any attachments here, but you can add some screenshots.
7 Things to Do Before Deleting / Archiving a Webflow Site
Step 1. Backup Content
Download any images, files, or content from your Webflow site that you want to keep. This includes things like blog posts, images, videos, and other media files.
Read “Save and restore backups” by Webflow University to learn how to back up the site content properly.
Step 2. Export Code
If you’ve made customizations to your site’s code or if you want to keep a copy of your site’s HTML, CSS, and JavaScript files, you can export your site’s code. This is especially important if you plan to recreate your site elsewhere.
Read “Code export” by Webflow University to learn how to export the site source code properly.
Step 3. Export CMS Data
If your site contains dynamic content managed through Webflow’s CMS (Content Management System), you should export your CMS data. This includes collections, items, and any associated content.
Read “Import / export Collection content” by Webflow University to learn how to export the site collection content properly.
Step 4. Note Settings
Take note of any custom settings, configurations, or integrations you’ve applied to your site. This could include custom domains, SSL certificates, form settings, and integrations with third-party services.
The easiest way to do this is to go through the site settings and take screenshots.
Step 5. Save Custom Styles
If you’ve applied custom styles or interactions to your site using Webflow’s Designer tool, make sure to document or save these styles elsewhere if you want to replicate them in the future.
Step 6. Check for Dependencies
Review your site for any dependencies on third-party services or integrations. If your site relies on external services for functionality, you may need to adjust or remove these dependencies before deleting the site.
Step 7. Notify Stakeholders
If your site is used by others or if it’s part of a larger project, make sure to notify relevant stakeholders about the impending deletion. This gives them a chance to retrieve any necessary information or make alternative arrangements.
Summary
As you can see, deleting a Webflow site is not as easy as it used to be, now it requires communication with support
Is it good or bad?
I think it might be annoying for sandbox owners. However, for business site owners it might be more safe. Imagine if your site brings you a lot of money and your Webflow account got hacked, would you like the process to be as simple as before? I wouldn’t.