Shopify Favicon. How to Add, Update and Remove One
Shopify is a solid e-commerce site builder that has developed a great UI that makes favicon management easy and intuitive so adding, updating, and removing favicon takes almost no effort and time.
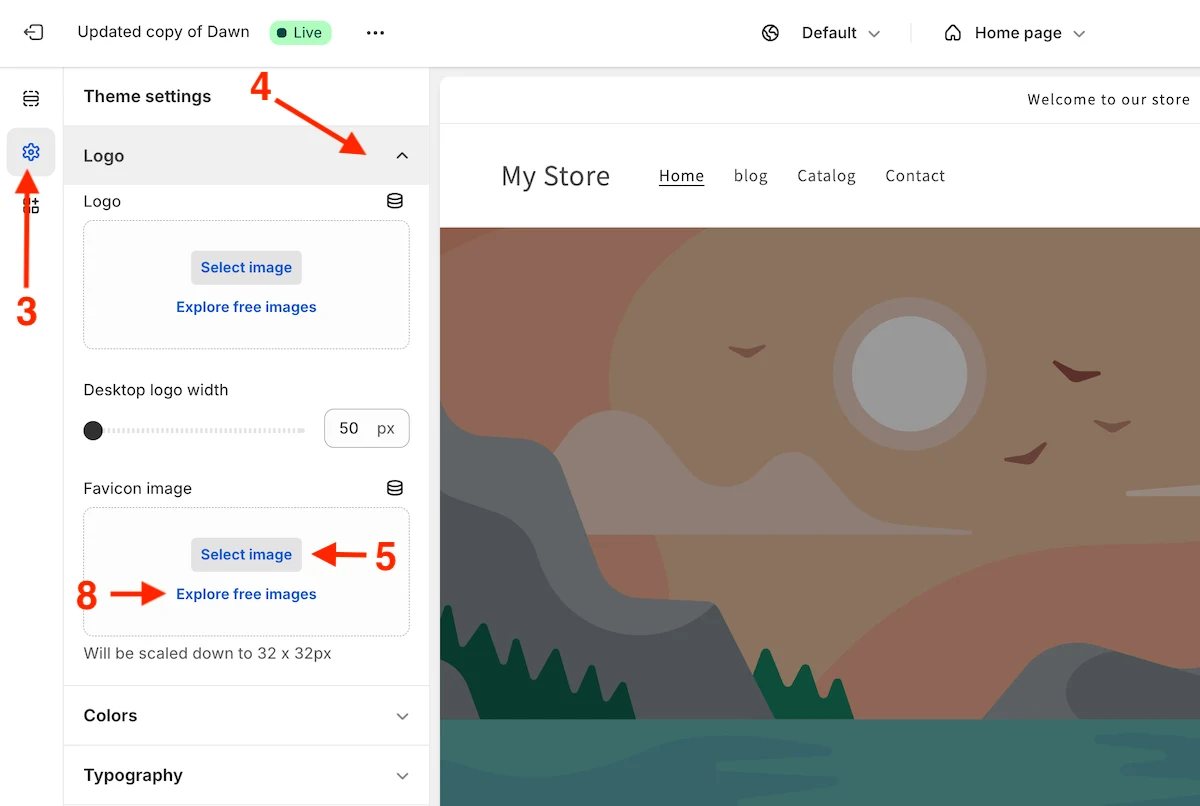
To ADD favicon to a Shopify store, navigate to “Online Store” > “Themes”, click on the “Customize” button of the current theme, go to the “Theme settings”, expand the “Logo” section, under “Favicon image” section click “Select image” to upload favicon.
To UPDATE favicon of a Shopify store, navigate to “Online Store” > “Themes”, click on the “Customize” button of the current theme, go to the “Theme settings”, expand the “Logo” section, under “Favicon image” section click on “Change” > “Select from library”.
To REMOVE favicon from a Shopify store, navigate to “Online Store” > “Themes”, click on the “Customize” button of the current theme, go to the “Theme settings”, expand the “Logo” section, under “Favicon image” section click on “Change” > “Remove”.
Shopify Favicon Image Requirements
Favicon Ratio
The most important criteria for favicon regardless of the platform is the image ratio, it have to be Square 1:1.
Favicon Dimensions
When it comes to dimensions, Shopify recommends favicon to have 16x16px or 32x32px of width and height.
Can you upload a bigger image? You can do it, but it will be automatically scaled down. That means Shopify applies some transformations to your favicon image, in this case, you might end up with an image quality different from what you expected.
It makes sense to follow the platform recommendations and create a favicon with proper dimensions right away, there are many favicon generators you can use for that.
Favicon Image Formats
Shopify doesn’t define directly what format a favicon image should have. However, to add favicon you need to use the Shopify image uploader, which supports the following formats for images:
- .jpeg
- .pjpeg
- .png
- .gif
- .heic
- .webp
- .avif
As you can see there’s no .ico on this list, so you can’t use it on Shopify, even though .ico is considered a standard format for favicons due to its wide browser support. You’re free to use any of the formats above.
How to Add Favicon to a Shopify Store?
Follow these 7 (or 14) steps to add favicon:
- Navigate to Online Store > Themes
- Click on Customize
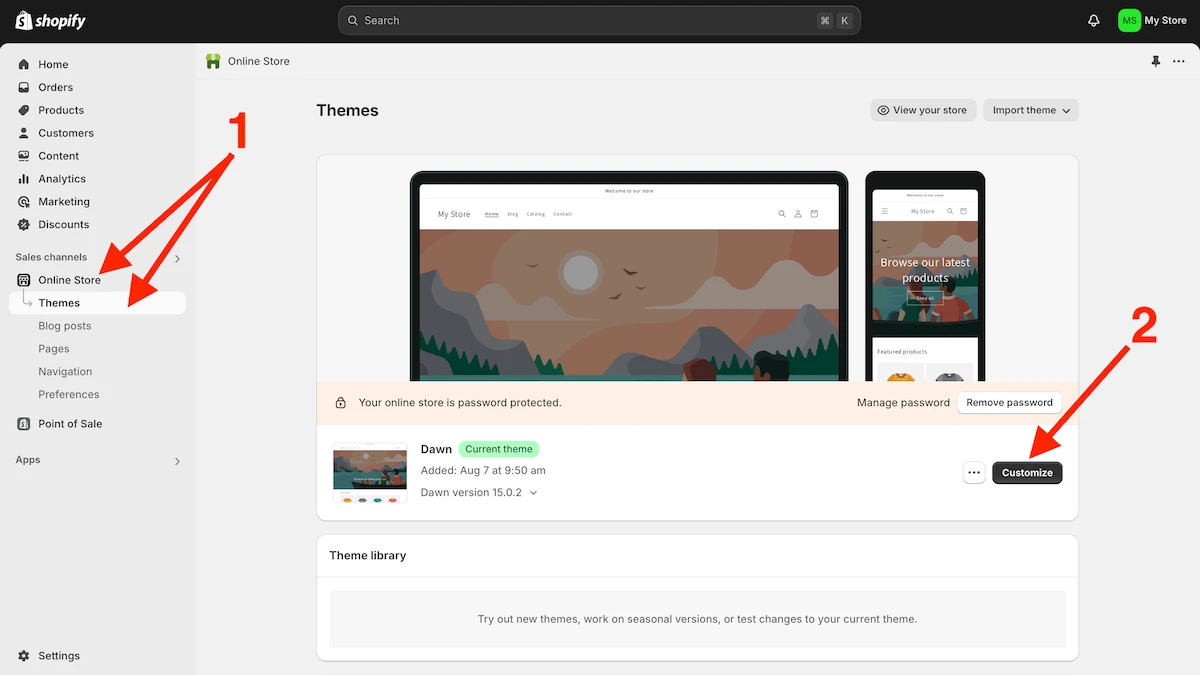
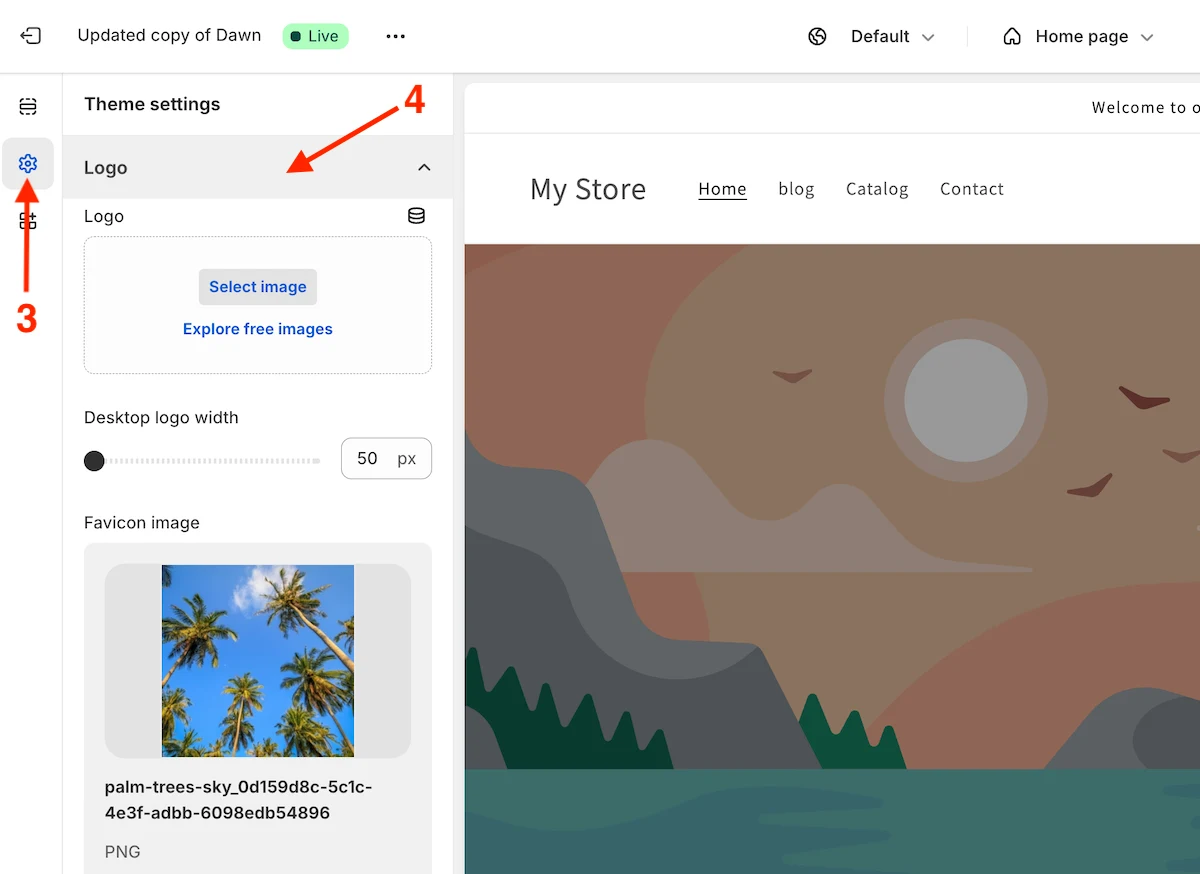
- Go to the Theme settings
- Expand the Logo section
- If you want to upload your own favicon image, click on Select Image under the Favicon image section
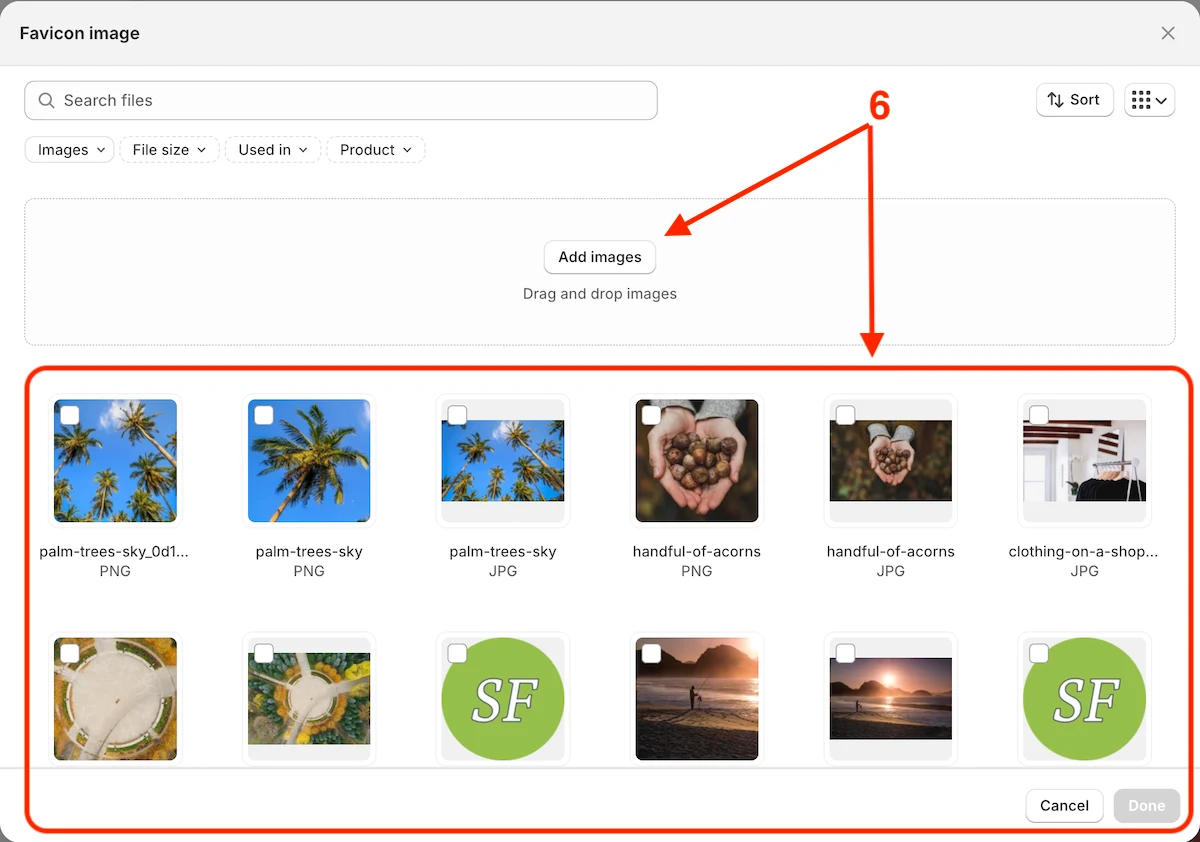
- Click on the Add images button to upload favicon from your machine or select it form your assets gallery
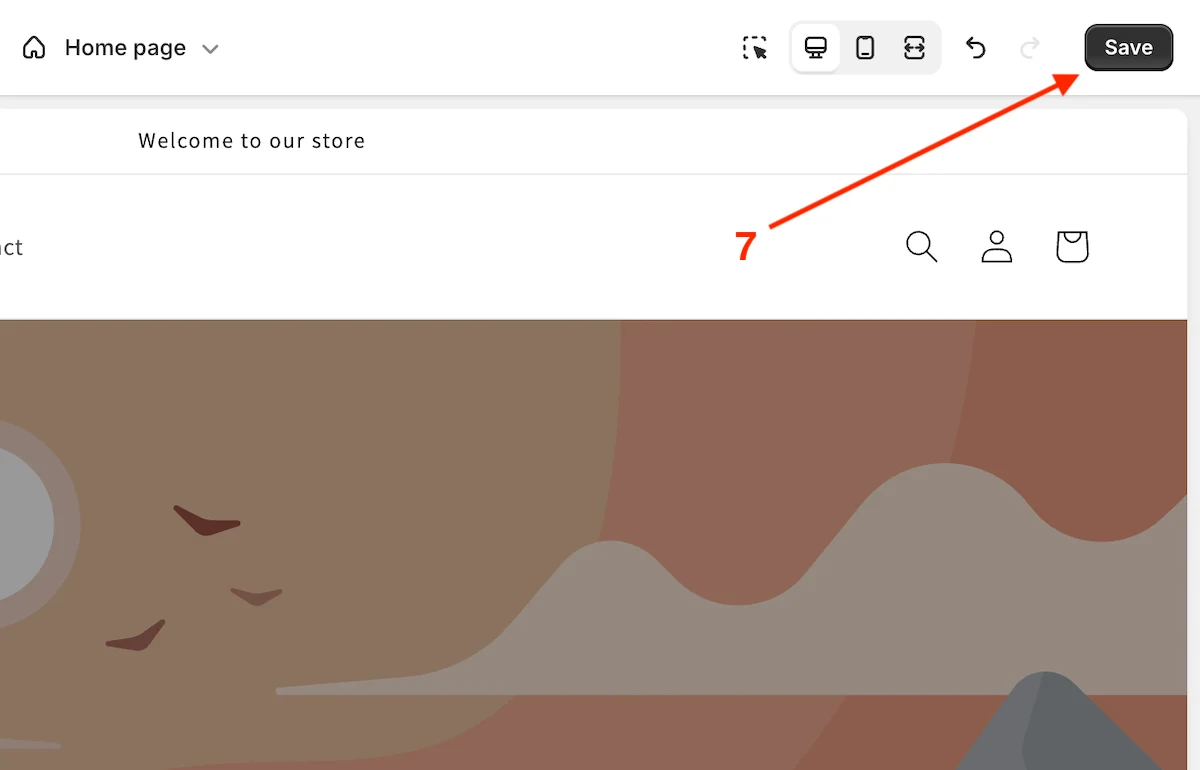
- Save the changes
- If you don’t have your own favicon yet, you can get one from the free images gallery, to do this click on Explore free images
- Select the images from the gallery
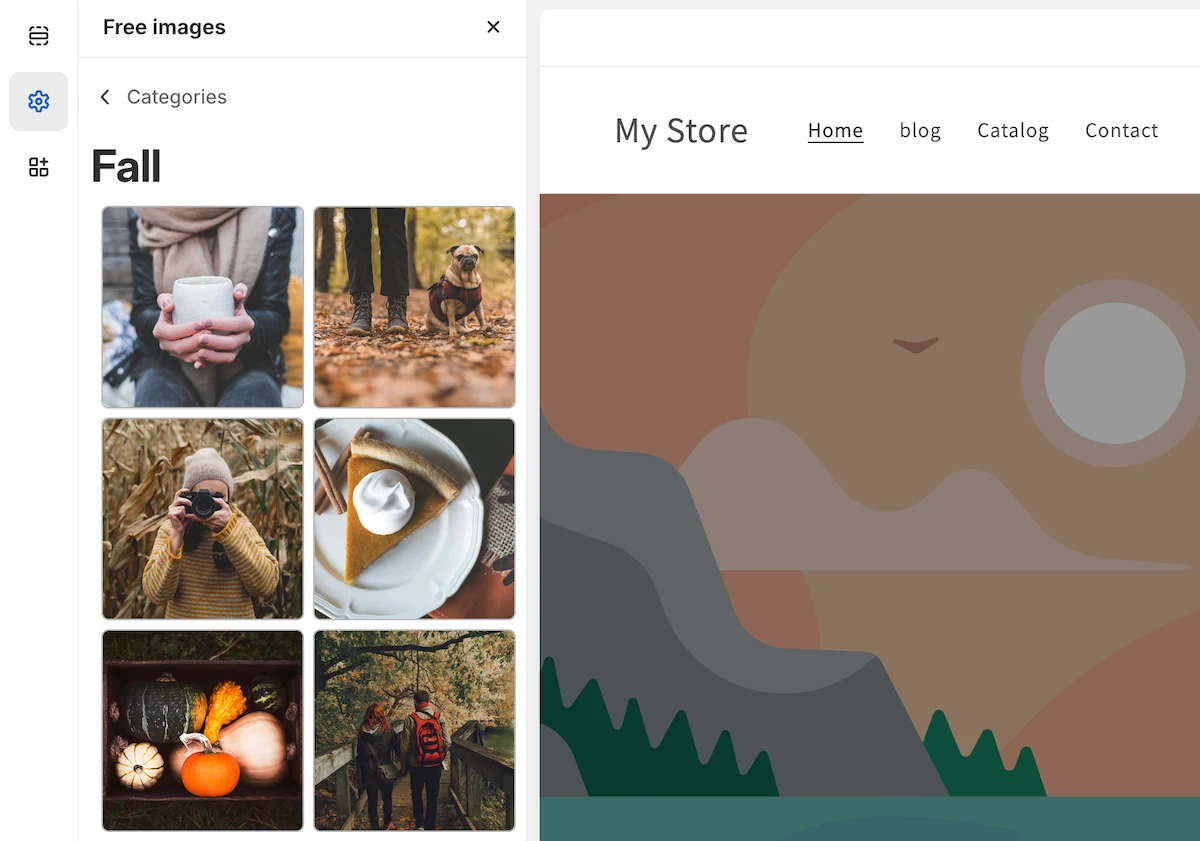
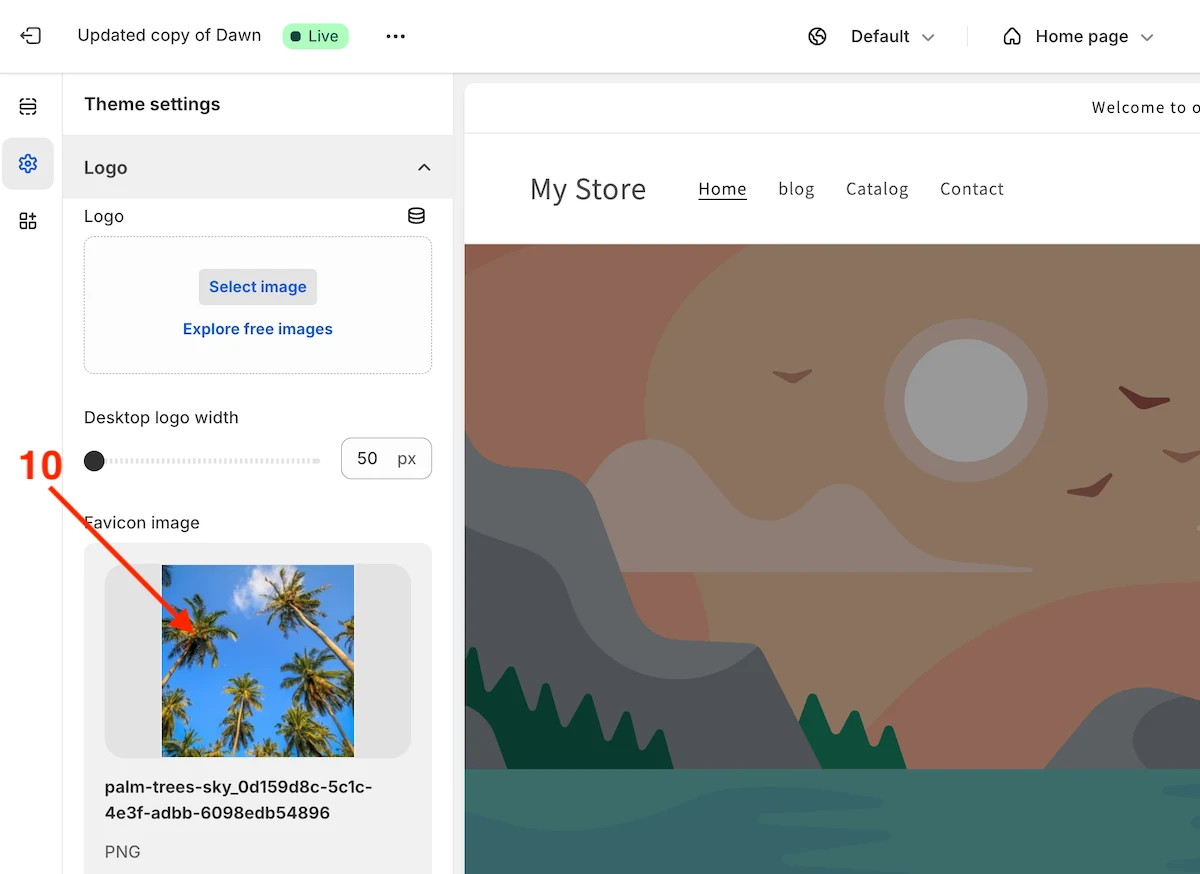
- Click on the Favicon image
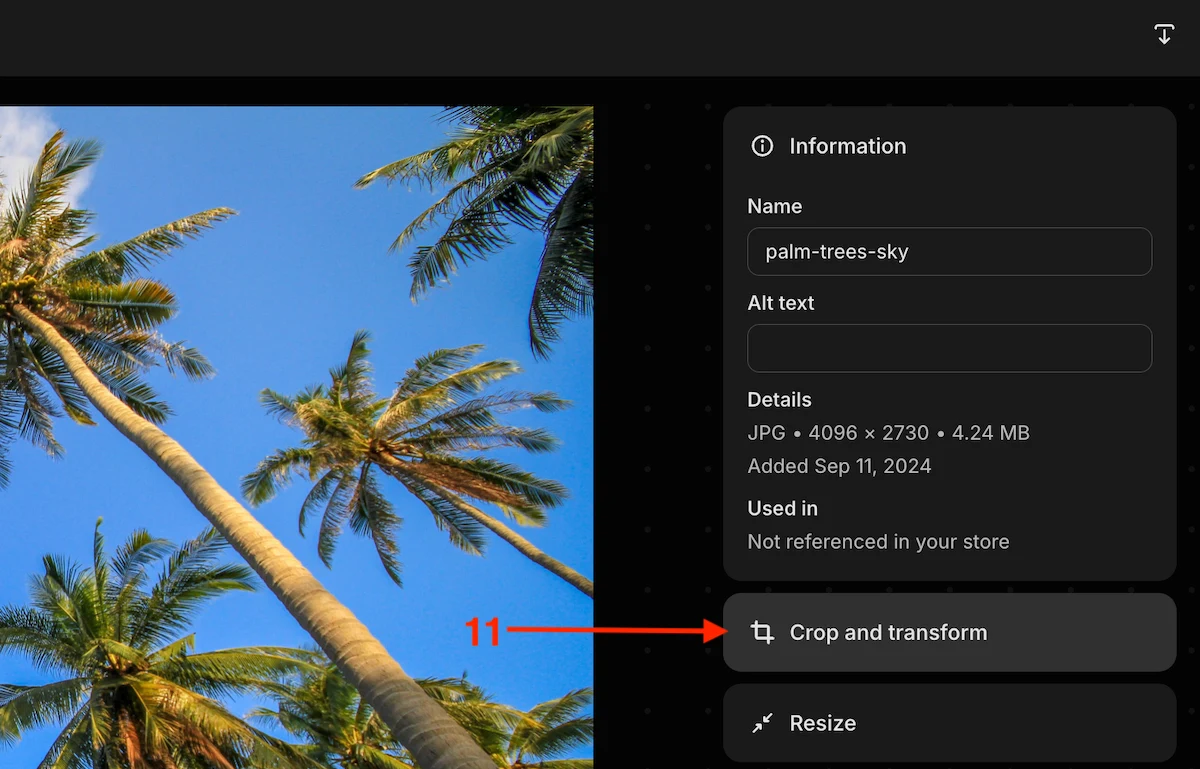
- Click on the Crop and transform button
- Select the Square (1:1) ratio and crop the image as you need
- Apply the changes and Save as new
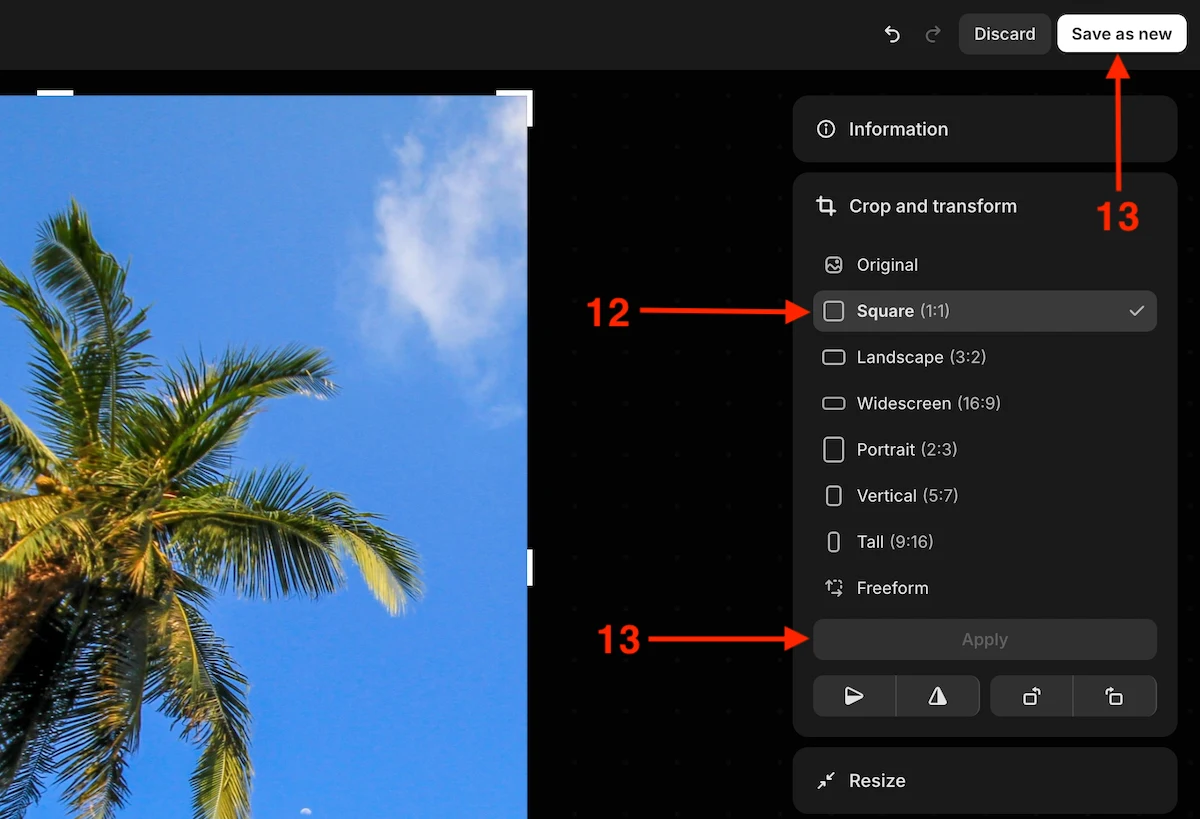
- Save the changes
How to Update Favicon of a Shopify Store?
Follow these 7 easy steps to update favicon:
- Navigate to Online Store > Themes
- Click on Customize

- Go to the Theme settings
- Expand the Logo section
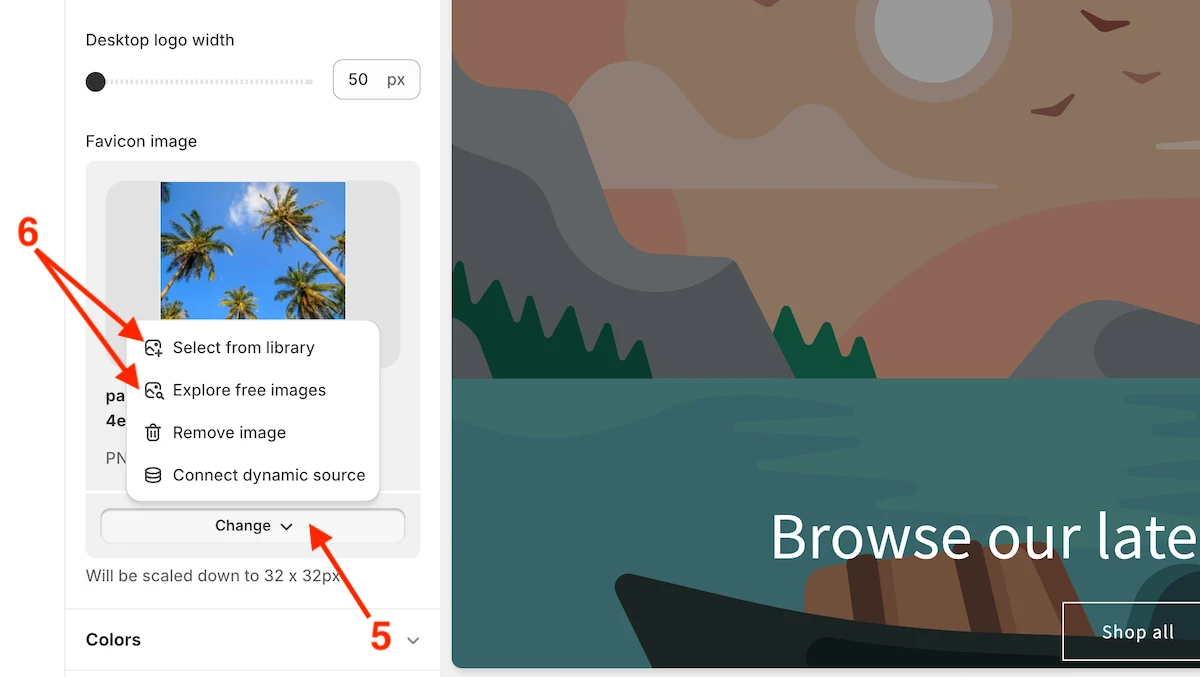
- Click on the Change button under the current favicon
- Click Select from library or Explore free images to set a new favicon
- Save the changes

How to Remove Favicon from a Shopify Store?
Follow these 7 easy steps to remove favicon:
- Navigate to Online Store > Themes
- Click on Customize

- Go to the Theme settings
- Expand the Logo section

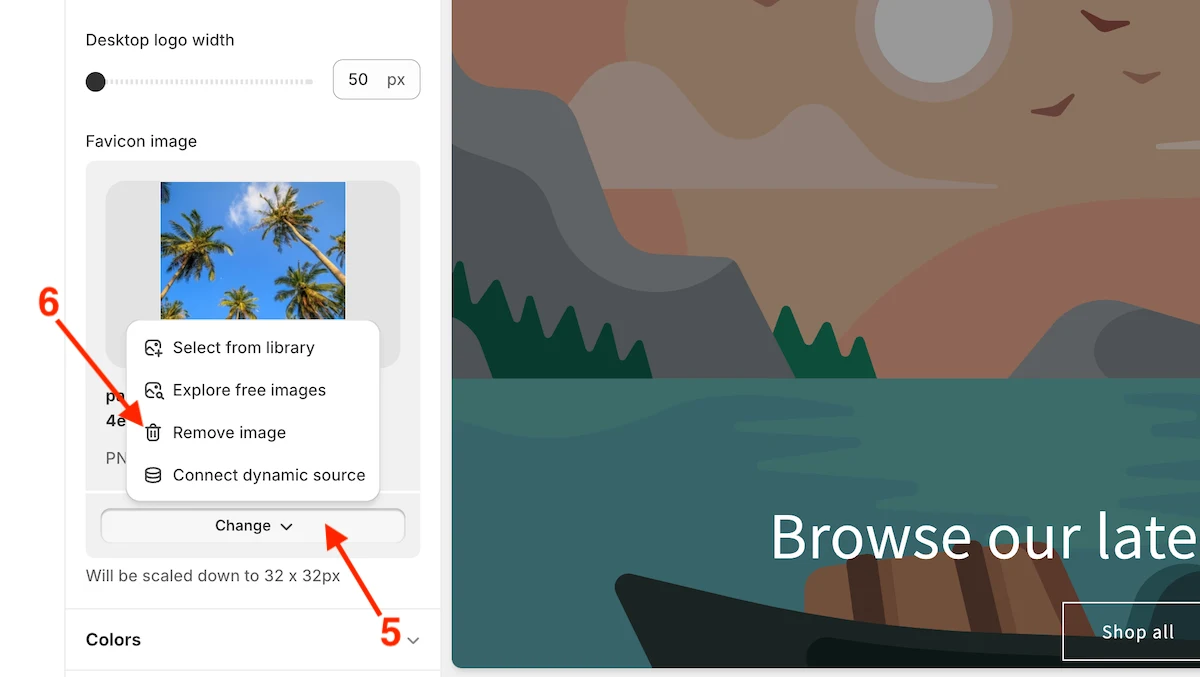
- Click on the Change button under the current favicon
- Click Remove
- Save the changes

Summary
Shopify provides a user-friendly UI, so it makes it easy to manage image assets including favicons, as a result adding, updating, and removing a favicon takes no more than 5 minutes of work.
To add/update a favicon to a Shopify store, ensure it has the 1:1 ratio, 32x32px dimensions and the format is .png.
