Webflow Favicon. How to Add, Update and Remove One
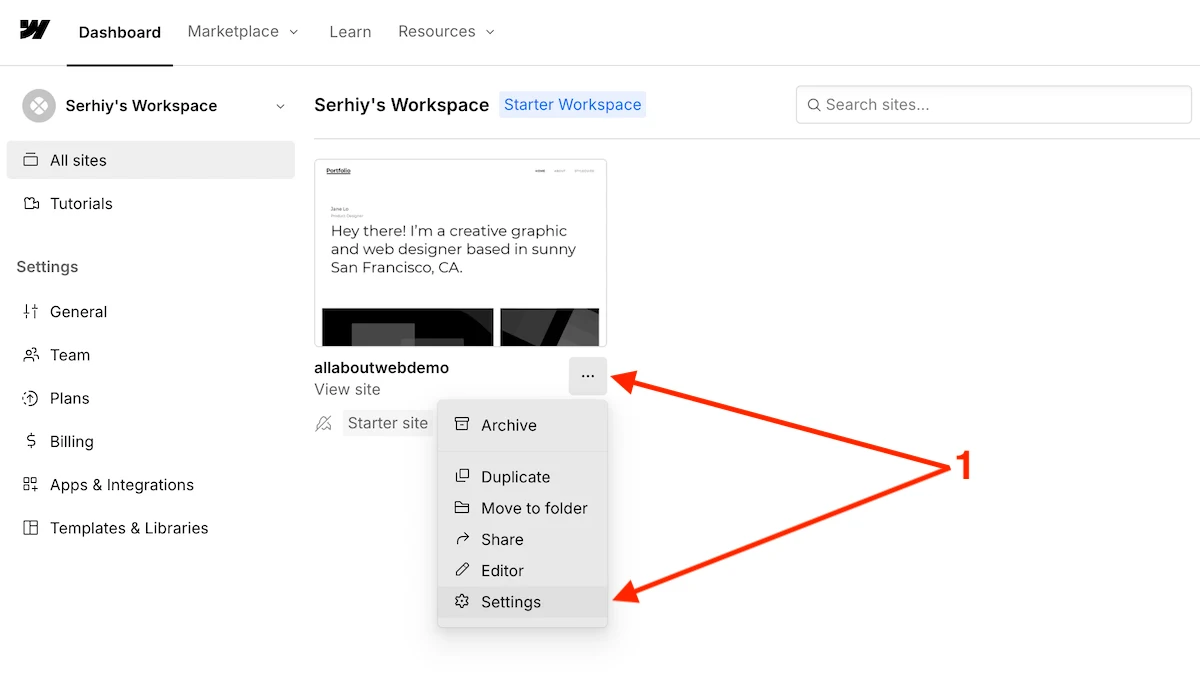
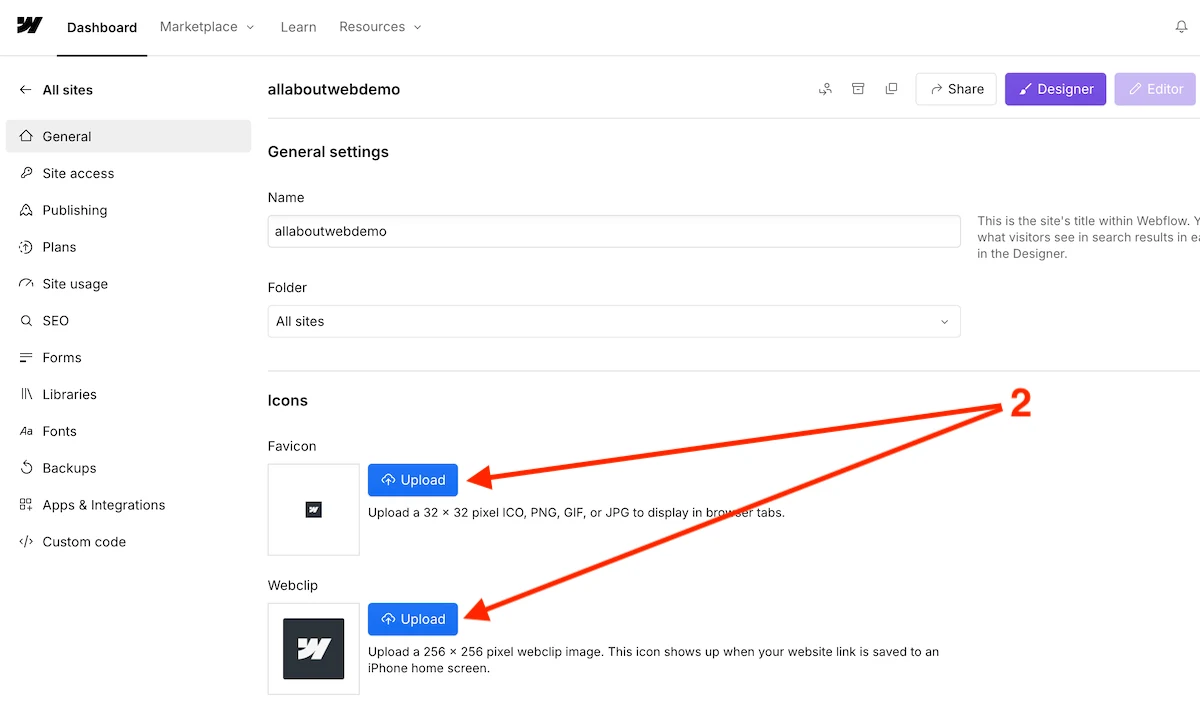
To ADD a favicon to a Webflow site, navigate to your website general settings, go to “General” > “Icons”, click on the “Upload” button and add a favicon image.
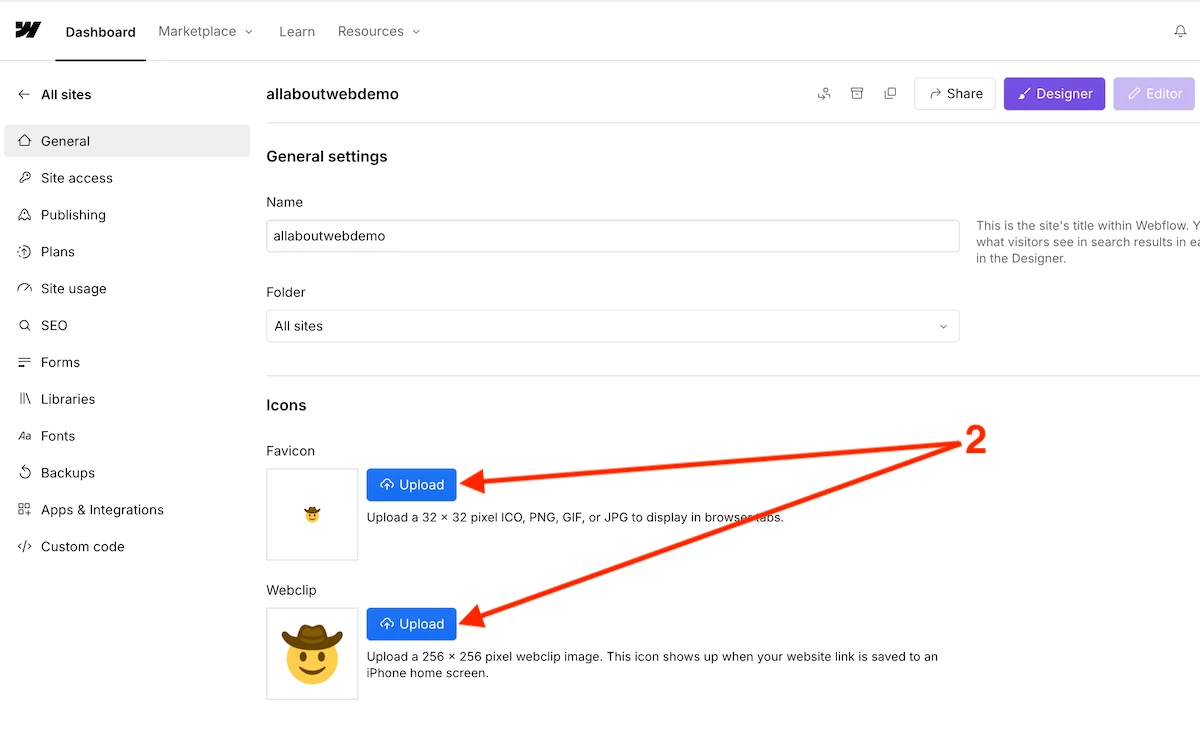
To UPDATE a favicon of a Webflow site, navigate to your website general settings, go to “General” > “Icons”, click on the “Upload” button and upload a new favicon.
To REMOVE a favicon from a Webflow site, navigate to your website general settings, navigate to your website general settings, go to “General” > “Icons”, click on the “Upload” button and upload a transparent image.
Webflow Favicon Requirements
A favicon image has to have the following ratio, dimensions and format:
| Ratio | Dimensions | Format |
|---|---|---|
| 1:1, square | 32x32px | .ico, .png, .jpg, .gif |
How to Add a Favicon to a Webflow Site?
Follow these 3 easy steps to add a favicon to a Webflow site:
- Navigate to the site Settings by clicking on the ellipsis menu

- In General > Icons settings, click on Upload to add a favicon image (same for Webclip if needed)

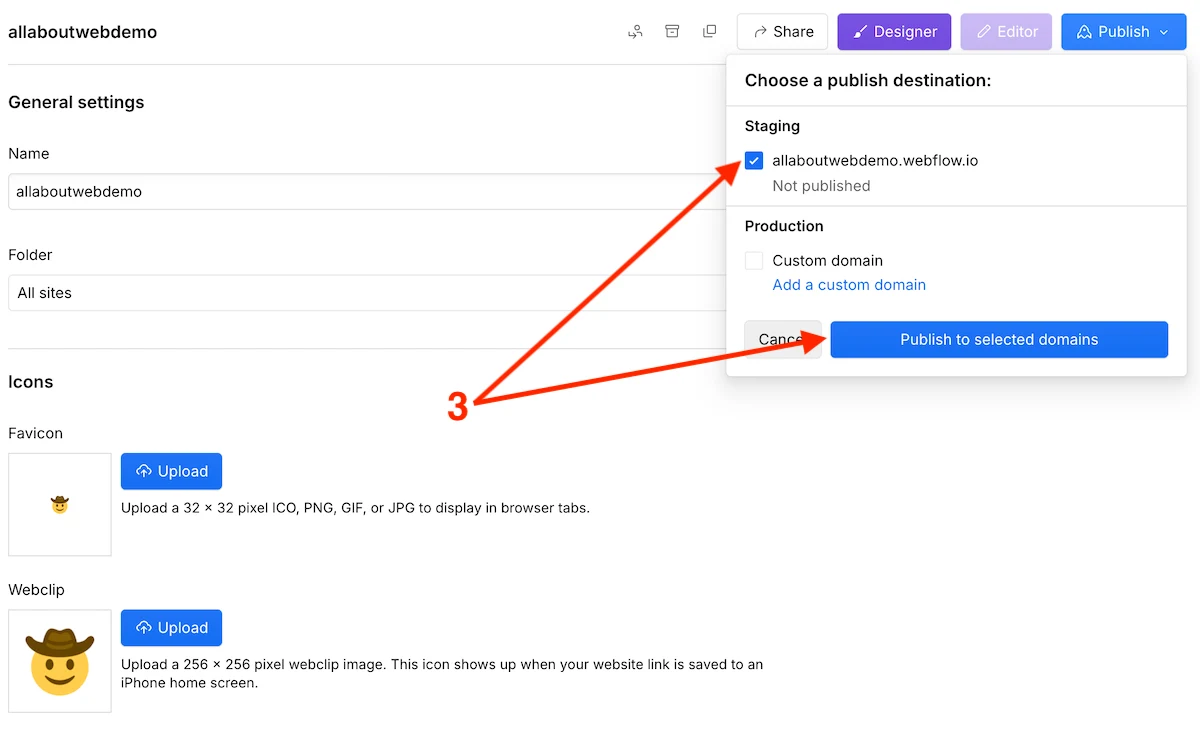
- Publish the changes

How to Update a Favicon of a Webflow Site?
Follow these 3 easy steps to change a favicon of a Webflow site:
- Navigate to the site Settings by clicking on the ellipsis menu

- In General > Icons settings, click on Upload to replace the already existing favicon image (same for Webclip if needed)

- Publish the changes

How to Remove a Favicon from a Webflow Site?
It’s impossible to remove a favicon from your Webflow site. At the moment of writing of this post such functionality doesn’t exist.
The only thing you can do in this situation is to upload a transparent image.
Summary
Webflow provides a user-friendly UI, so it makes it easy to manage image assets including favicons, as a result adding, updating, and removing a favicon takes no more than 5 minutes of work.
To add/update a favicon to a Webflow site, ensure it has the 1:1 ratio, 32x32px dimensions, and .ico format(or .png, .jpg, .gif).
