Blogger Copyright Footer. Add, Edit and Auto Update the Year

Setting up a copyright notice on Blogger (Blogspot) is a must-have if you are willing to protect your website content legally. Blogger, like any platform, has its specifics, and some people struggle to configure the footer block, including the copyright.
Blogger provides the ability to add a copyright notice in several ways, you can use the default functionality or set up a custom one. The copyright editing and removal depend on the way you added it, but that’s relatively easy. You might experience some difficulties if you want to automatically update the copyright year.
Let’s see how to do this properly.
Right before we start: This post describes how to dynamically change the copyright year considering the Blogger platform specifics. The topic is complex and you might want to learn more about it here. It also can be helpful if you’re not a Blogger website owner.
How to Add, Edit and Remove a Copyright Notice?
By default, a freshly created Blogger website doesn’t contain any copyright notice. In order to add one you should follow these steps:
- Select your website
- Navigate the Layout section on the left sidebar
- Scroll down to the very bottom of the page
- Click on the Attribution Gadget Edit icon
- Enter the copyright text in the Configure Attribution popup input
- Save changes
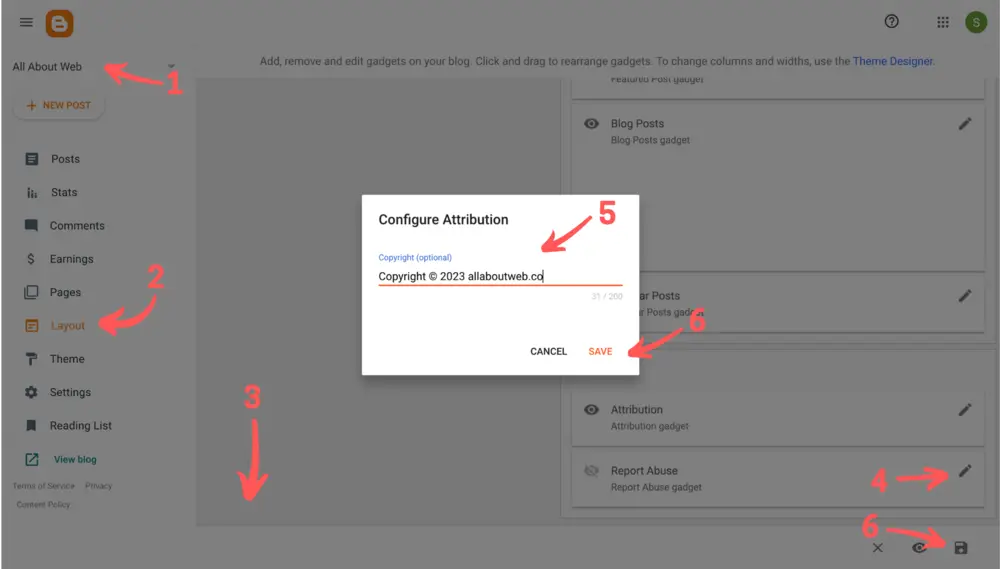
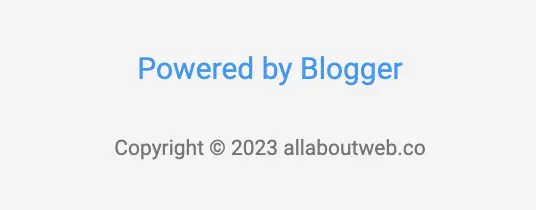
Here’s the result:
To edit the copyright notice use instruction above but at the step 5, change already existing copyright text.
To remove the copyright notice, do the same but clean up the input value.
You might notice the copyright input takes only plain text, and there’s no way to put an HTML code with a script for the copyright year auto-update.
No worries, I’ll describe how to do this in the following section.
How to Automatically Update the Copyright Year?
As I mentioned before Footer Attribution gadget doesn’t provide any functionality to implement needed behavior, since it takes only plain text. That’s why you need to update the year manually.
Dynamically changed copyright year requires a bit different approach. We need to modify the HTML copyright notice element by injecting current year with JavaScript.
To do so, we can create a custom script. But first, if you have already set the copyright in a default way, make sure you removed it, otherwise, both default and custom copyright blocks will be displayed.
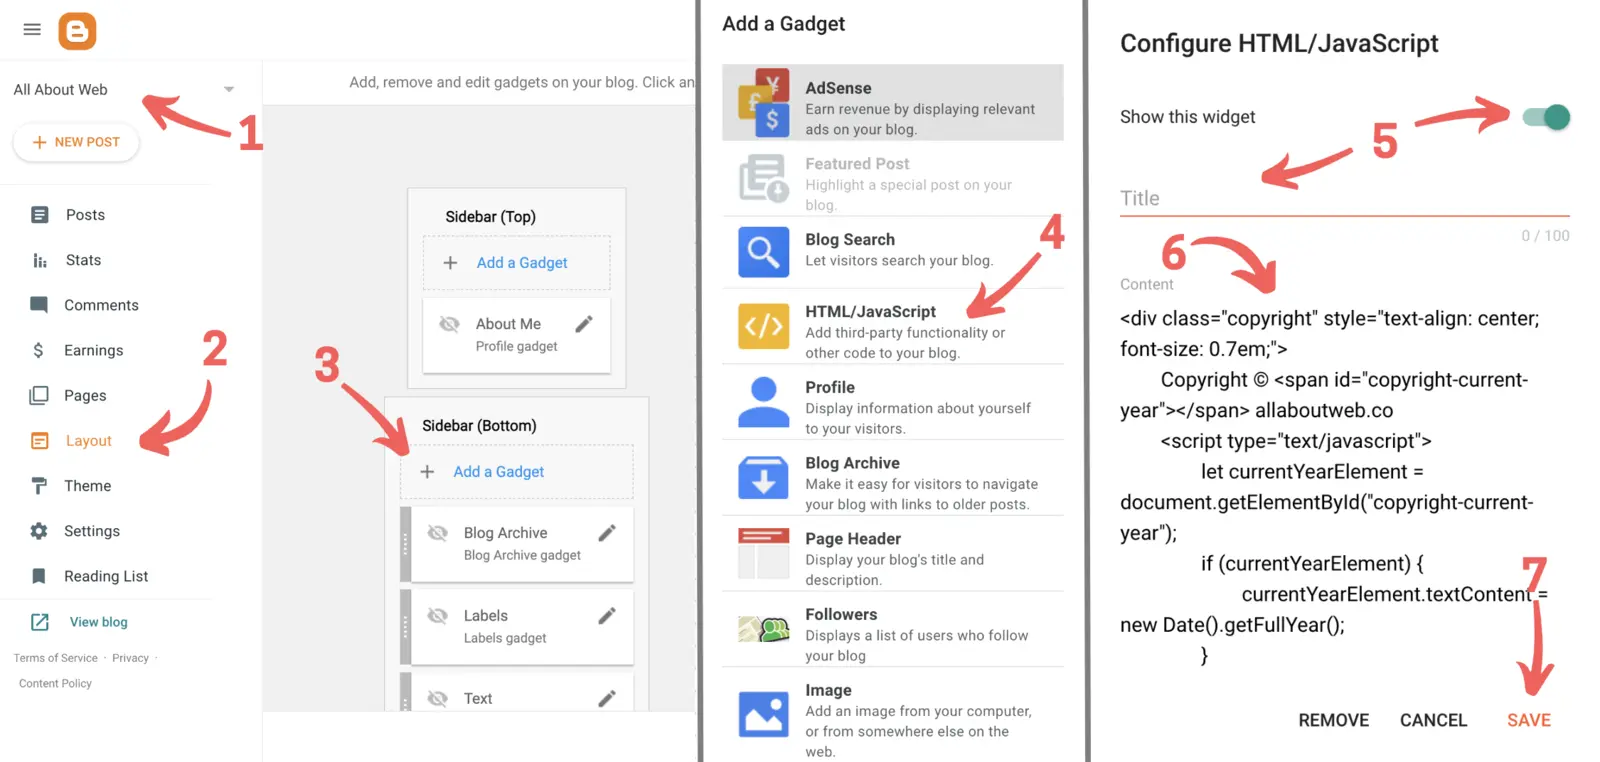
Ok, now it’s time to add the script:
- Select your website
- Navigate to the Layout section on the left sidebar
- Click Add a Gadget button
- Select HTML/Javascript gadget
- In the Configure HTML/JavaScript pop-up keep Show this widget switched on and the Title field empty (unless you want it to be shown)
- Copy and paste the following code snippet into the Content field (don’t forget to edit the copyright with your data)
<div class="copyright" style="text-align: center; font-size: 0.7em;"> Copyright © <span id="copyright-current-year"></span> allaboutweb.co <script type="text/javascript"> let currentYearElement = document.getElementById("copyright-current-year"); if (currentYearElement) { currentYearElement.textContent = new Date().getFullYear(); } </script> </div> - Click on the Save button
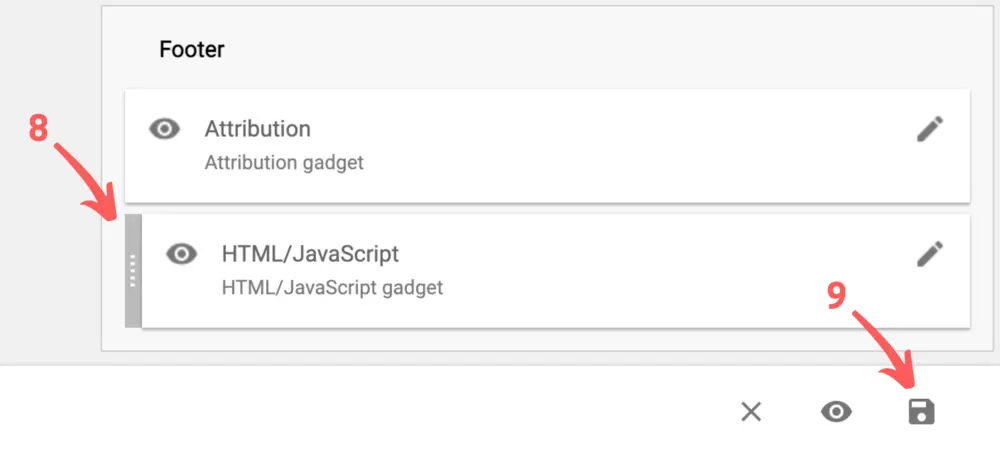
- Drag and drop the gadget block under the Footer Attribution one
- Click on the Save button at the bottom right corner of the page
Here’s the result:
As you can see, we’ve got the same result as before. Isn’t it cool?
Let’s quickly review what this HTML snippet does.
There are three main HTML elements div, span, and script.
<div class="copyright" style="text-align: center; font-size: 0.7em;">…</div>is a root element that contains the copyright notice content and the script for the year auto-update. It also has the style attribute that aligns text by a center and sets a font size taken from the default theme styles. If you want to add more styles it’s worth using a style tag instead of an attribute. Here you can edit the text of the copyright notice.<span id="copyright-current-year"></span>is an element that plays the role of a container for dynamically changed year value.<script type="text/javascript">…</script>is an element that contains business logic that processes the logic of current year value update.
If you switch off Show this widget field of the custom gadget the copyright will disappear. Deleting the gadget permanently deletes the copyright.
What is Copyright?
Copyright is a type of intellectual property that protects a creator of original material from unauthorized duplication or use. When you publish content on a website, it becomes copyrighted automatically.
However, for the sake of extra protection, a copyright policy should be set explicitly. This helps to claim compensation in case of unauthorized usage and prevent Innocent Infringement.
Check out this post to learn more about the copyright stuff: Copyright Footer - Examples, HTML, Symbol, Format and More
Choosing the Proper Copyright Notice Format
This is a copyright notice format formula:
[1] Copyright [2] © [3] YYYY or YYYY - YYYY [4] Entity name [5] Rights statement
- The “Copyright” word (Optional)
- The copyright symbol © (Required)
- Current year 2025 or a range of years 2022 - 2025 (Required)
- An entity name (Required)
- An author’s full name
- A company name
- A website domain name
- A rights statement (Optional)
- All rights reserved
- Some rights reserved
- No rights reserved
Copyright notice examples:
- © 2025 John Doe
- Copyright © 2025 John Doe
- © 2025 John Doe. All rights reserved.
- © 2022 - 2025 AllAboutWeb LLC. Some rights reserved.
- © 2022 - 2025 allaboutweb.co. No rights reserved.
My personal preference is the last one: Copyright © 2025 All About Web Co. All Rights Reserved. Although you are free to use any format you like or consider valid in your particular case.
Summary
As you can see, it’s super easy to add, edit and remove a Blogger website copyright notice.
Use default functionality in case no extra customization is needed, and you’re ok with updating the copyright year manually every year.
Use a custom gadget if you need more customization and/or you want to update the copyright year automatically.
If you suspect someone has stolen your website content, you might want to Report potential Blogger policy violation