Remove Made in Webflow Badge in 5 Minutes

As well as many other site builders, Webflow displays its own branding on the websites it produces. It might sometimes conflict with your brand, and Made in Webflow or Powered by Webflow badges could not fit it.
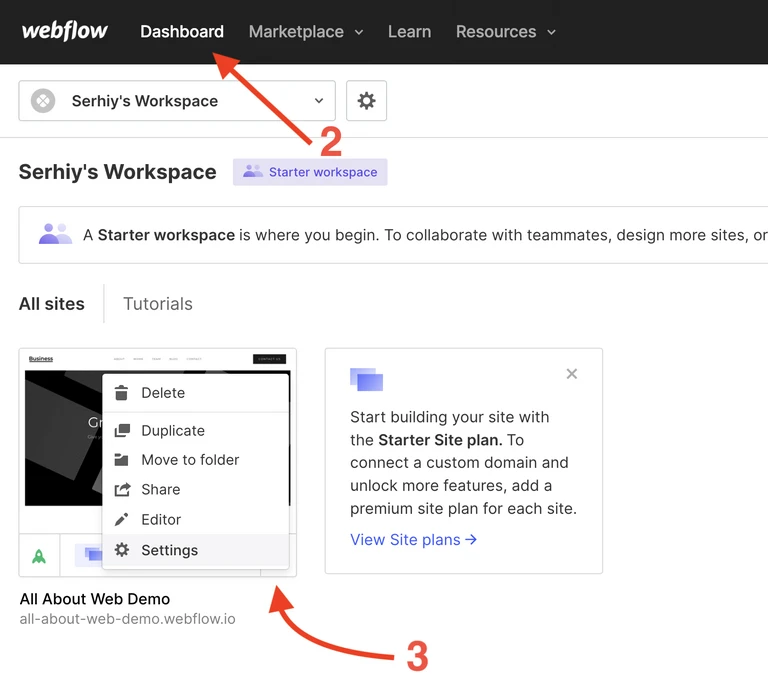
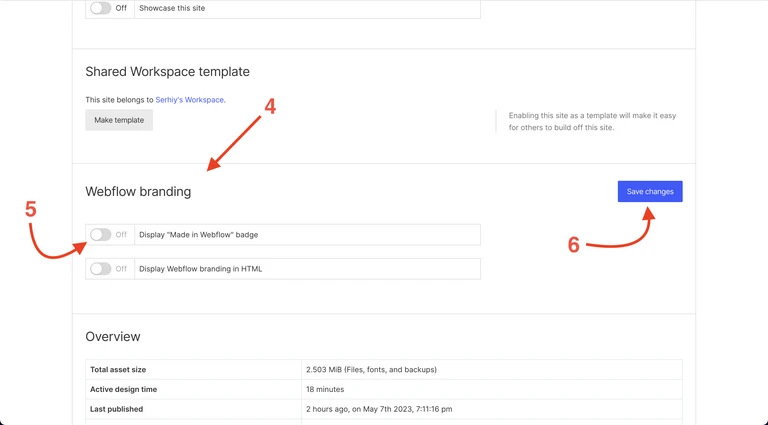
To remove the “Made in Webflow” badge, upgrade to any business plan, go to the Dashboard, look for the site tile and click on its Ellipsis button, navigate to Settings > Generals > Webflow branding, then disable “Display ‘Made in Webflow’ badge” and save the changes.
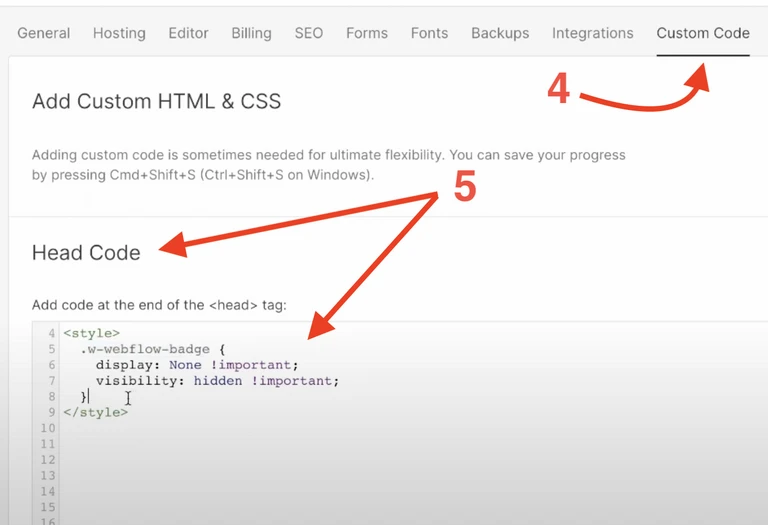
To remove the “Made in Webflow” badge using Custom Code, upgrade to any business plan, go to the Dashboard, look for the site tile and click on its Ellipsis button, navigate to Settings > Generals > Custom code, then insert CSS code (you can find it below) to hide the badge HTML element and save the changes.
Let’s dive into the details.
How to Remove the “Made in Webflow” Badge
Method 1. Upgrade to a Business Plan
This is a primary option to remove Webflow branding from your website.
According to Webflow site plans any paid plan is considered a business plan. At the time of writing this article, it can be a Basic, CMS, or Business plan.
Unfortunately, if you have the Starter plan, there’s no way to remove the “Made in Webflow” tag.
Follow these 6 steps to get rid of the badge:
- Upgrade your account to a business plan
- Access your Dashboard
- Navigate to the website Settings by clicking the ellipsis button
- In the Generals tab, scroll down to the Webflow branding section.
- Disable the Display “Made in Webflow” badge
- Save your changes.
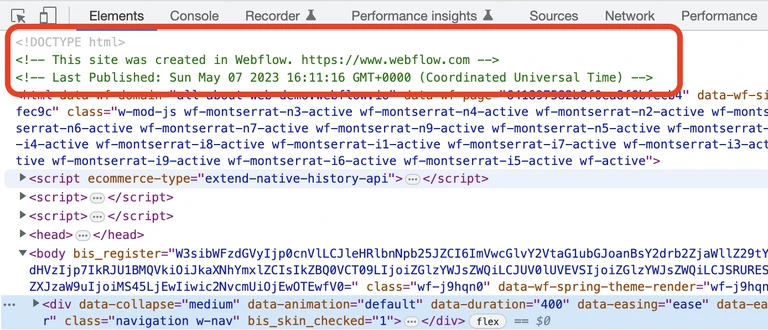
If you switch off Display Webflow branding in HTML then the following message won’t be displayed in the source code of your website:
Method 2. Using Custom Code
As mentioned above, the first method is more suitable to solve the problem.
So when should you use this one?
There are two cases:
-
When standard functionality doesn’t work, it could be a temporary solution until Webflow Customer Support helps you resolve the problem.
-
When you have the Custom Code feature available but not the Branding Removal one. For instance, that might happen if you have the Core workspace.
Important: this is considered a workaround and Webflow doesn’t expect you to do it. Be conscious about making this kind of decision.
Follow these 6 steps to hide the badge with custom CSS code:
- Upgrade your account to any paid plan
- Access your Dashboard
- Navigate to the website Settings by clicking the ellipsis button
- Go to the Custom code tab
- Insert the provided code snippet into the Head Code text area
<style> .w-webflow-badge { display: none !important; visibility: hidden !important; } </style> - Save your changes
How to Remove the “Powered by Webflow” Footer Text
By default, the “Powered by Webflow” text sits within the footer block. That’s how it looks on a freshly created website:

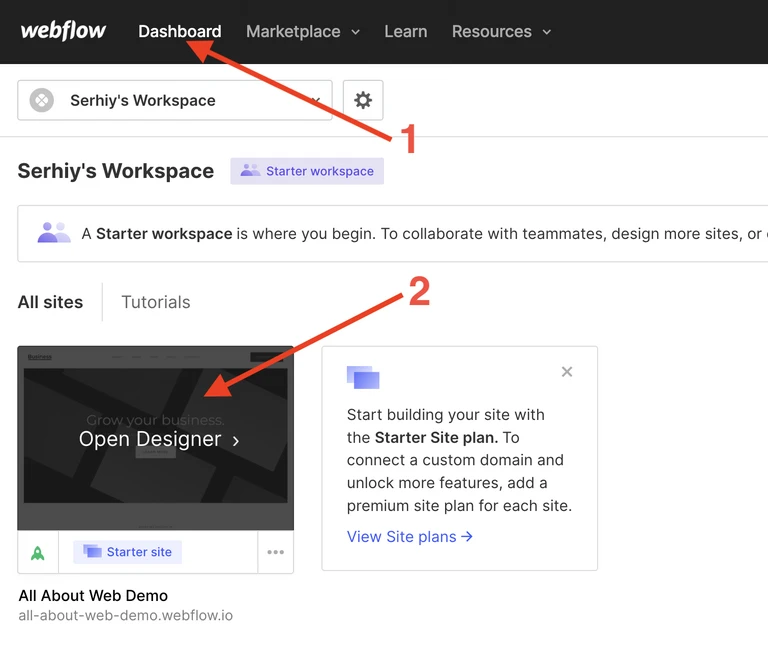
- Go to the Dashboard
- Hover over the website tile and click “Open Designer”
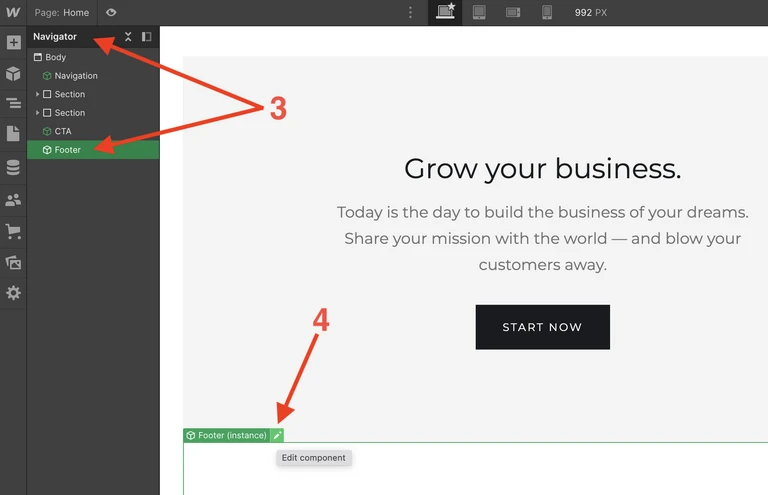
- In the left-side Navigator bar, select the Footer item
- Scroll down and click the Pencil/Edit icon of the Footer block
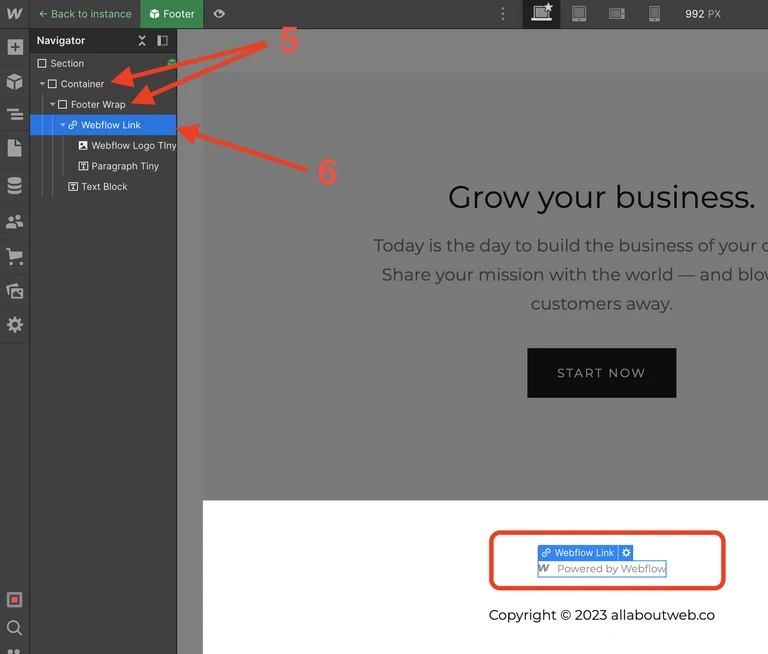
- In the Navigator, expand the footer entities one by one
- Select the Webflow link and press the Backspace key
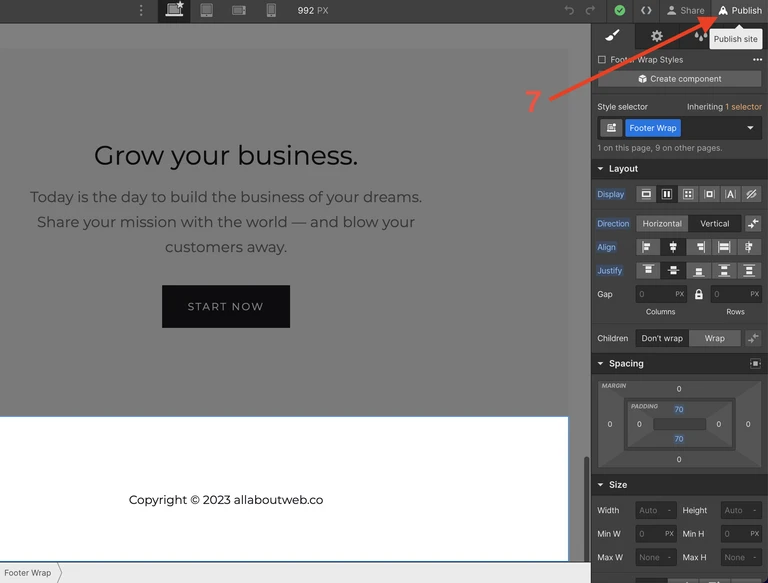
- Apply the changes by clicking the Publish button at the top right corner of the page
All done!
Summary
As you’ve seen, it only takes a few minutes to remove the “Made in Webflow” tag, but it’s not an option on the free plan.
With a bit more effort, you can also eliminate the “Powered by Webflow.”
Is it worth it? Absolutely, as these customizations enhance your website’s branding and overall quality.